
Hello and welcome to this comprehensive guide to install Hades on your Steam Deck! 👋
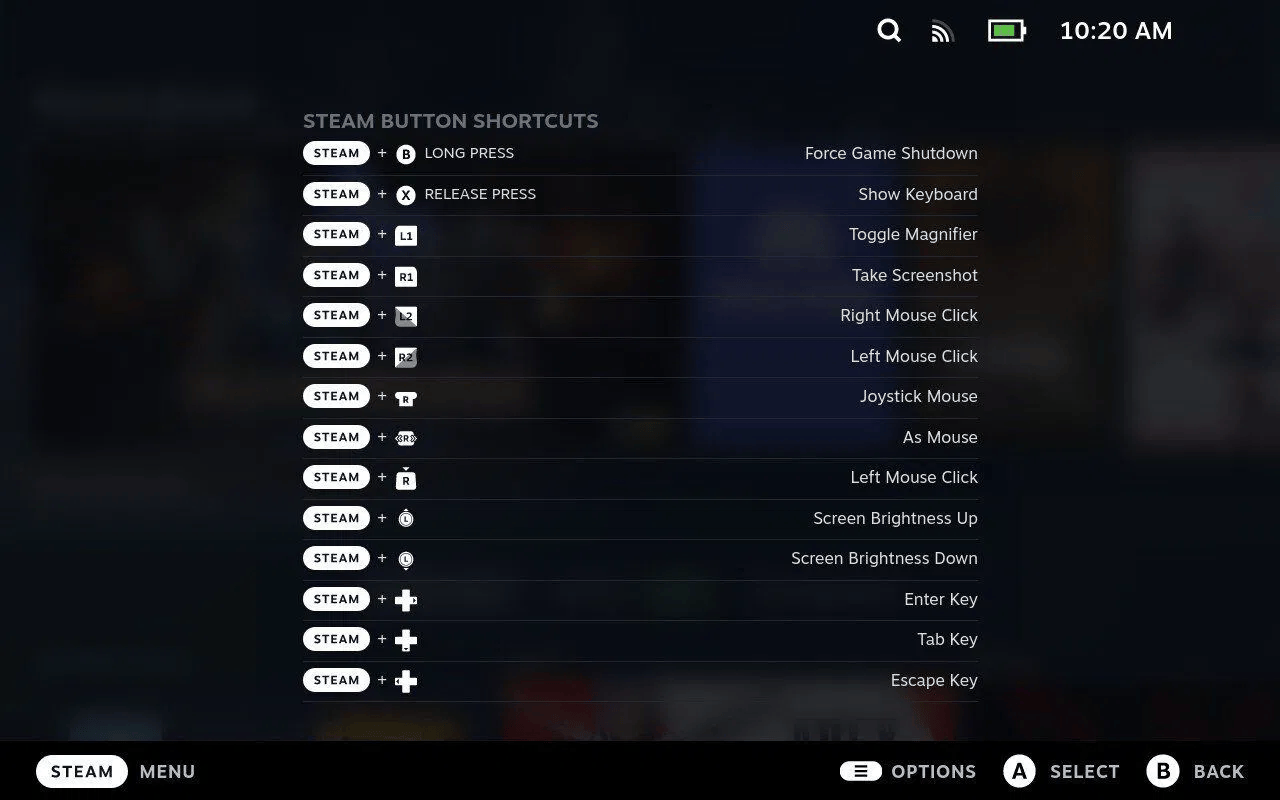
For the best experience, consider connecting a keyboard and mouse to your Steam Deck via the USB-C port, as most steps are performed in Desktop Mode. If that’s not possible, refer to the shortcut cheatsheet below for essential Desktop Mode commands (right-click, virtual keyboard access, and more).
Installation #
- Press the Steam button and select
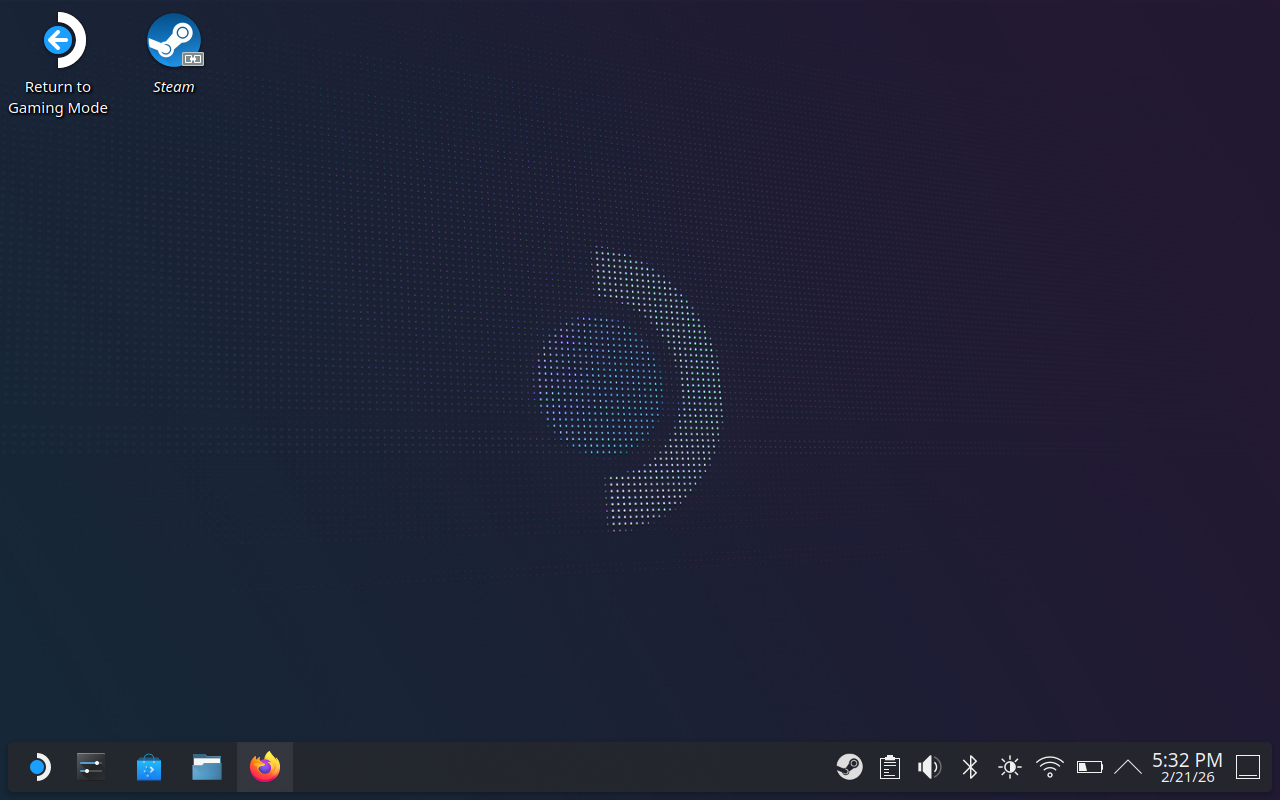
Power->Switch to Desktop.
This will transition your Steam Deck to a Linux-based desktop environment, allowing you to install external applications. - Open the file explorer and create a folder named
Hadesinside yourDocumentsdirectory. - Launch Firefox and visit the official Hades download page:
The URL ishttps://www.hades-emu.org/download/.
See the shortcut reference above to input the URL. - Download the latest AppImage release for Linux,
labelledLinux (AppImage, x64). - Move the AppImage to the
Hadesfolder you created earlier. - Right click on the AppImage:
Properties->Permissionsand setAllow executing file as program. - Obtain both the GBA BIOS file and your preferred game’s ROM.
These files must be added while in Desktop Mode and cannot be transferred once you return to Gaming Mode.
Please note that Hades does not distribute these files for legal reasons.
For further details, refer to the classic installation guide.
Hades is now available on your Steam Deck. A brief configuration step remains before you’re ready to play.
Settings #
To optimize your experience on the Steam Deck, the following configuration adjustments are recommended:
- Launch Hades by double-clicking the AppImage file
- In the menu bar, select
File->Settings. - Under
General, enableStart last played game on startup. - Under
Video, setMenubar ModetoHide automatically. - Under
Video, setDisplay ModetoFullscreen (borderless). - Under
Video, disableAuto-Detect UI Scaleand manually setUI Scaleto200%. - From the menu bar, select
File->Open BIOSand choose the BIOS file obtained earlier. - Then select
File->Openand choose your game’s ROM.
NOTE: To exit the emulator in fullscreen mode, open the File menu from the menu bar and click Exit.
NOTE: You can also set a gamepad binding to focus the menu bar more easily.
Adding Hades to Steam #
To fully integrate Hades into your Steam Deck experience, add it as a non-Steam application:
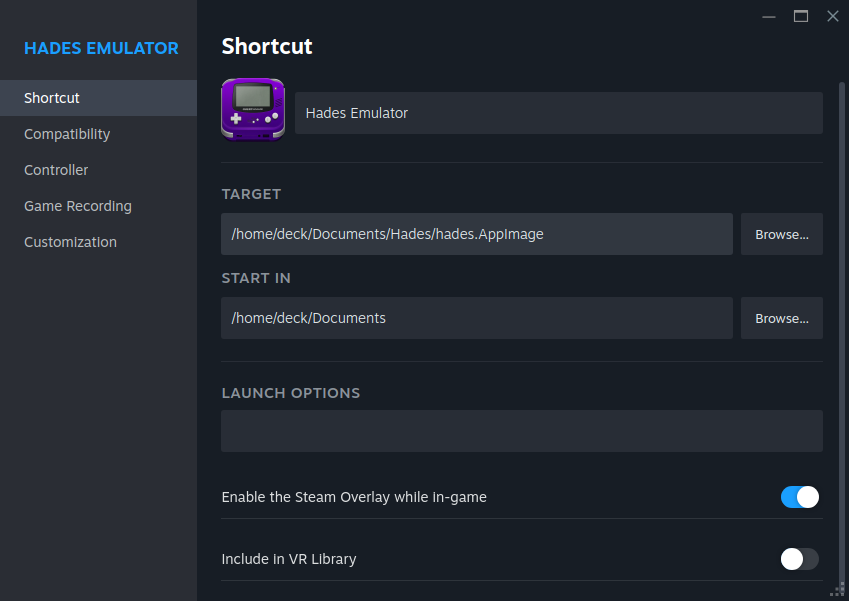
- Right-click the AppImage in your
Hadesfolder and selectAdd to Steam. - Download the media package available here.
- Double-click the downloaded archive file and select
Extract.
Extract it into yourHadesfolder. - Open Steam by right-clicking the system tray icon (bottom right) and selecting
Library. - Locate the Hades entry, click the gear icon and select
Properties.... - In the
Shortcutsection, rename the entry toHades Emulator. - In the
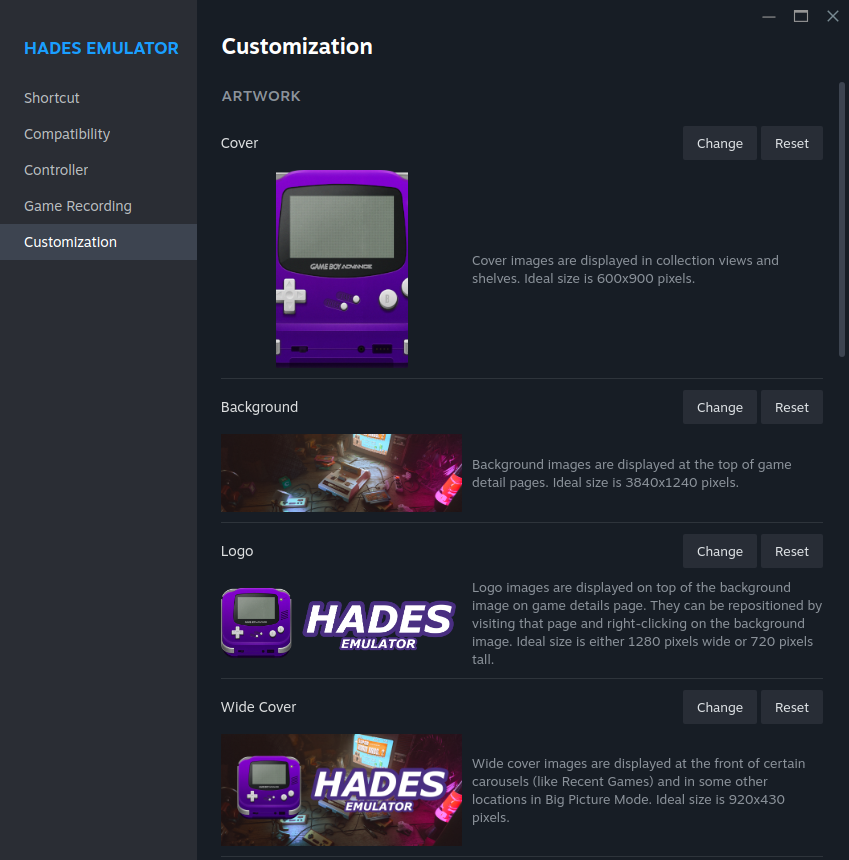
Customizationsection, assign:
- Cover:
cover.png - Background:
background.png - Logo:
logo.png - Wide Cover:
wide-cover.png
- Return to the
Shortcutsection and set the application icon toicon.png.
All these assets are included in the previously downloaded media package.
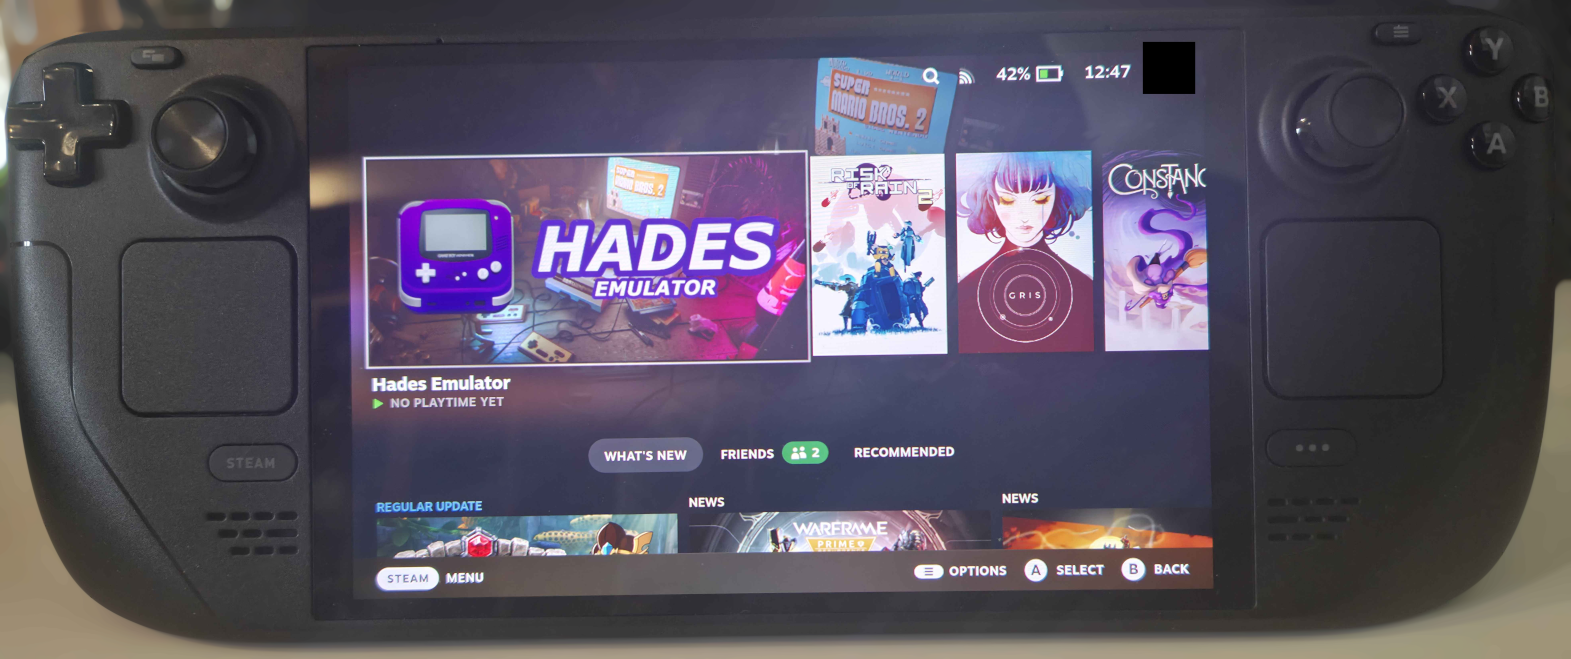
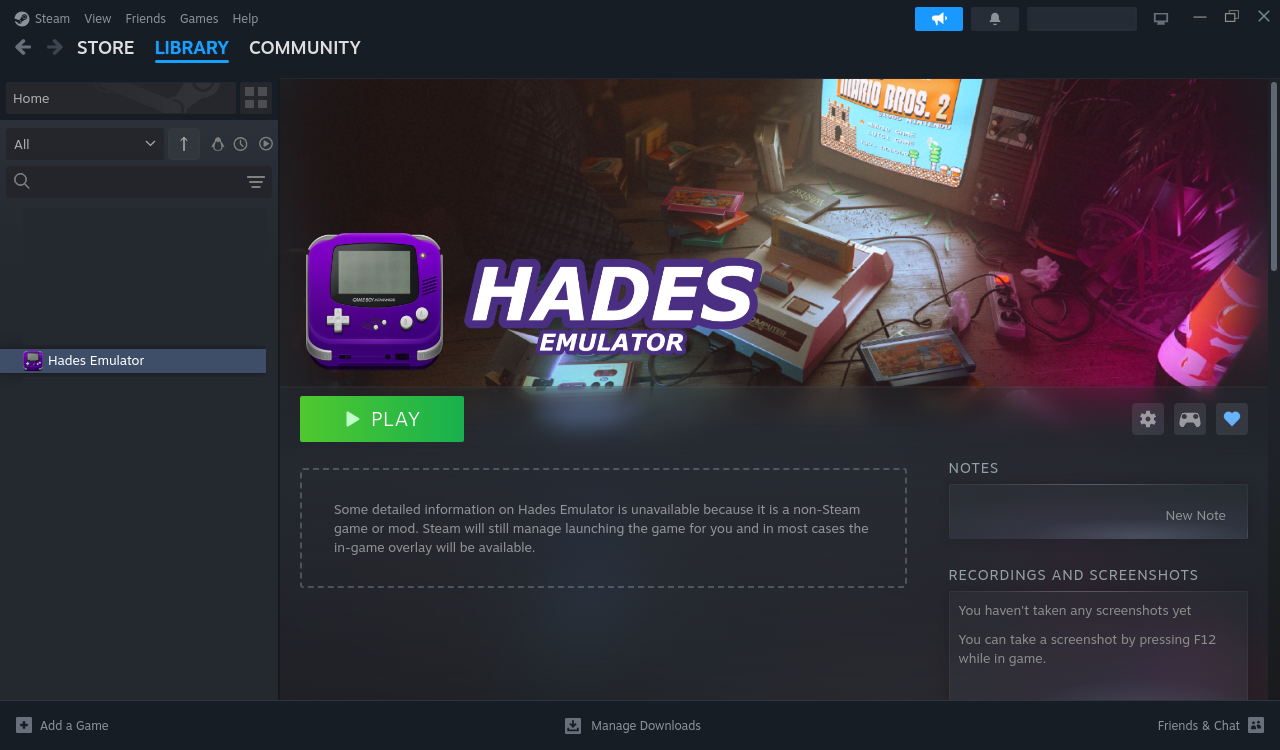
Here’s what the final Steam entry will look like:
Once everything is set up, simply use the Return to Gaming Mode shortcut on the desktop to switch back and start playing.
Enjoy your enhanced Hades experience on the Steam Deck! 🎮